
YouTube just launched a free-to-use suite of creative editing tools. Here's how to use the YouTube Create app.
On Sept. 21, 2023, YouTube debuted the new YouTube Create app– a branded suite of free-to-use tools for editing and creating videos. With the app (currently available on Android only), creators can edit their footage with royalty-free music, automatic captioning, transition effects, GIF/sticker/text overlays, and an array of other easy-to-use, professional options.
The company bills it as a one-size-fits-all solution empowering amateur creators to design professional-quality videos– at minimal effort and zero cost.
Who Can Try YouTube Create
YouTube Create, now in beta, is available to Android users in the United States, the United Kingdom, India, France, Germany, Indonesia, South Korea, and Singapore. YouTube says it tentatively plans to launch the app in additional markets.
Want to try YouTube Create? Get it in the Google Play store. Here's how to use it.
How to Use YouTube Create
Once you've installed YouTube Create, open it on your phone and select + to choose a video or photo from your device library.
Precision Editing, Effects, & Filters
The videos (and photos) you've imported will appear in a precision editor timeline.
Beneath the precision editor, you'll see options like Split, Filters, Effects, Adjust, Speed, Volume, Audio Cleanup, Rotate, Replace, Rearrange, Delete, and Duplicate.
- To insert a new photo or video at any timestamp, select +.
- To trim a video, select the scissors option and it'll splice the clip at the timestamp you've selected. To delete a portion of the trimmed video, hit the trash can icon.
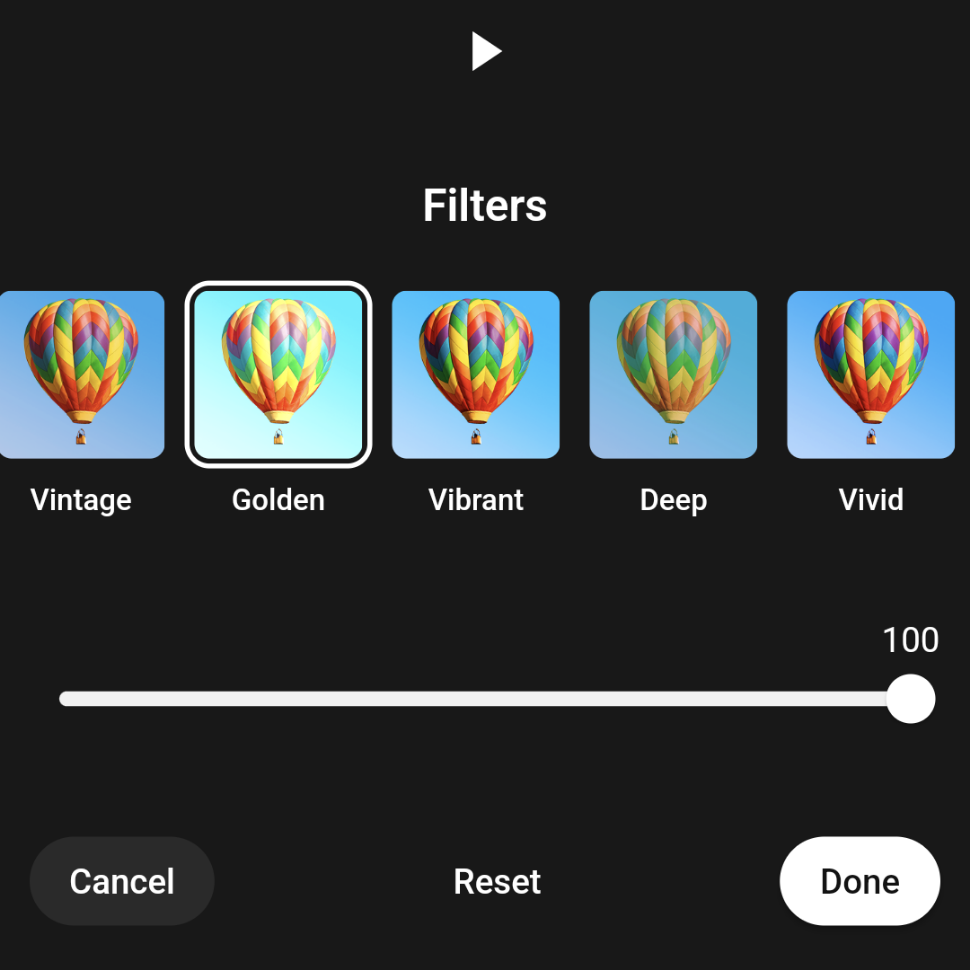
- To edit a video or photo, long-select it to see new edit options appear. If you don't like a Filter or Effect you've added, select the Effect again and hit Reset to remove it.
- To rearrange the videos and photos you've added, select Rearrange. Drag and drop them into the order you'd like. You can also use Duplicate to duplicate them or Replace if you change your mind and want to upload a new clip instead.
- To edit how long a photo displays, long-press on it and trim it down to the duration you'd like by moving both ends to the center.
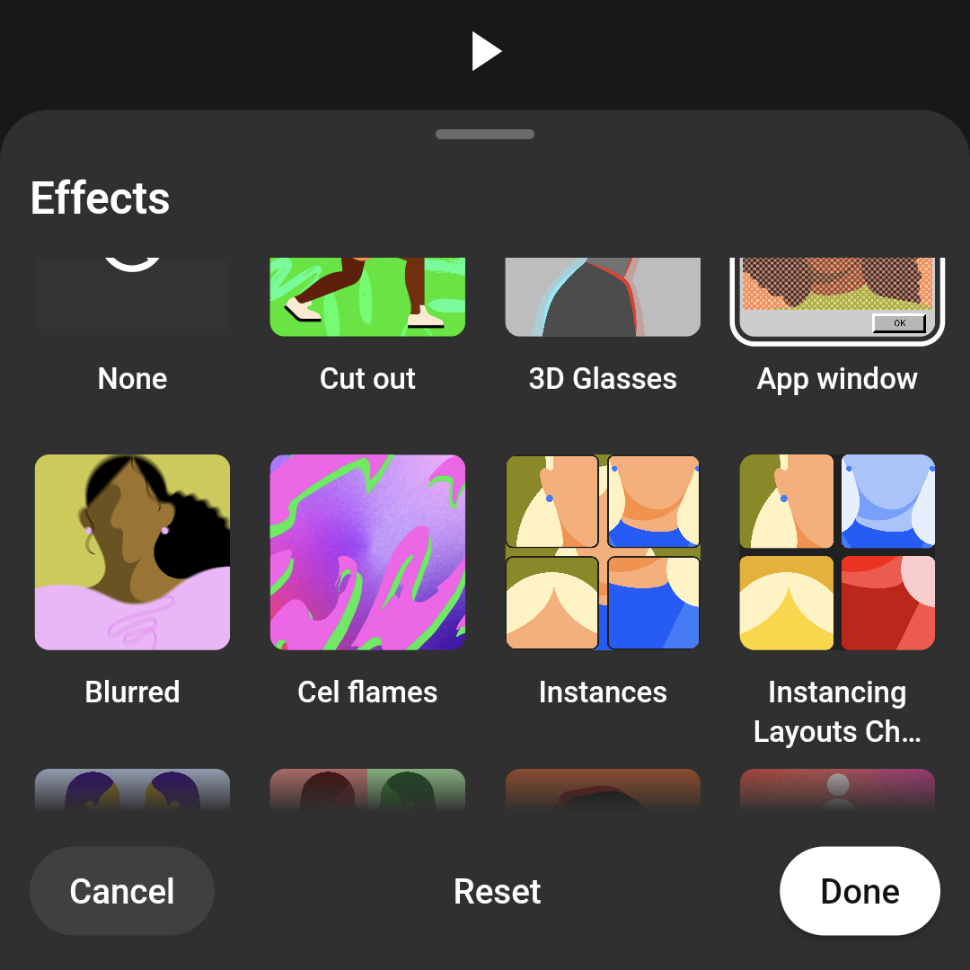
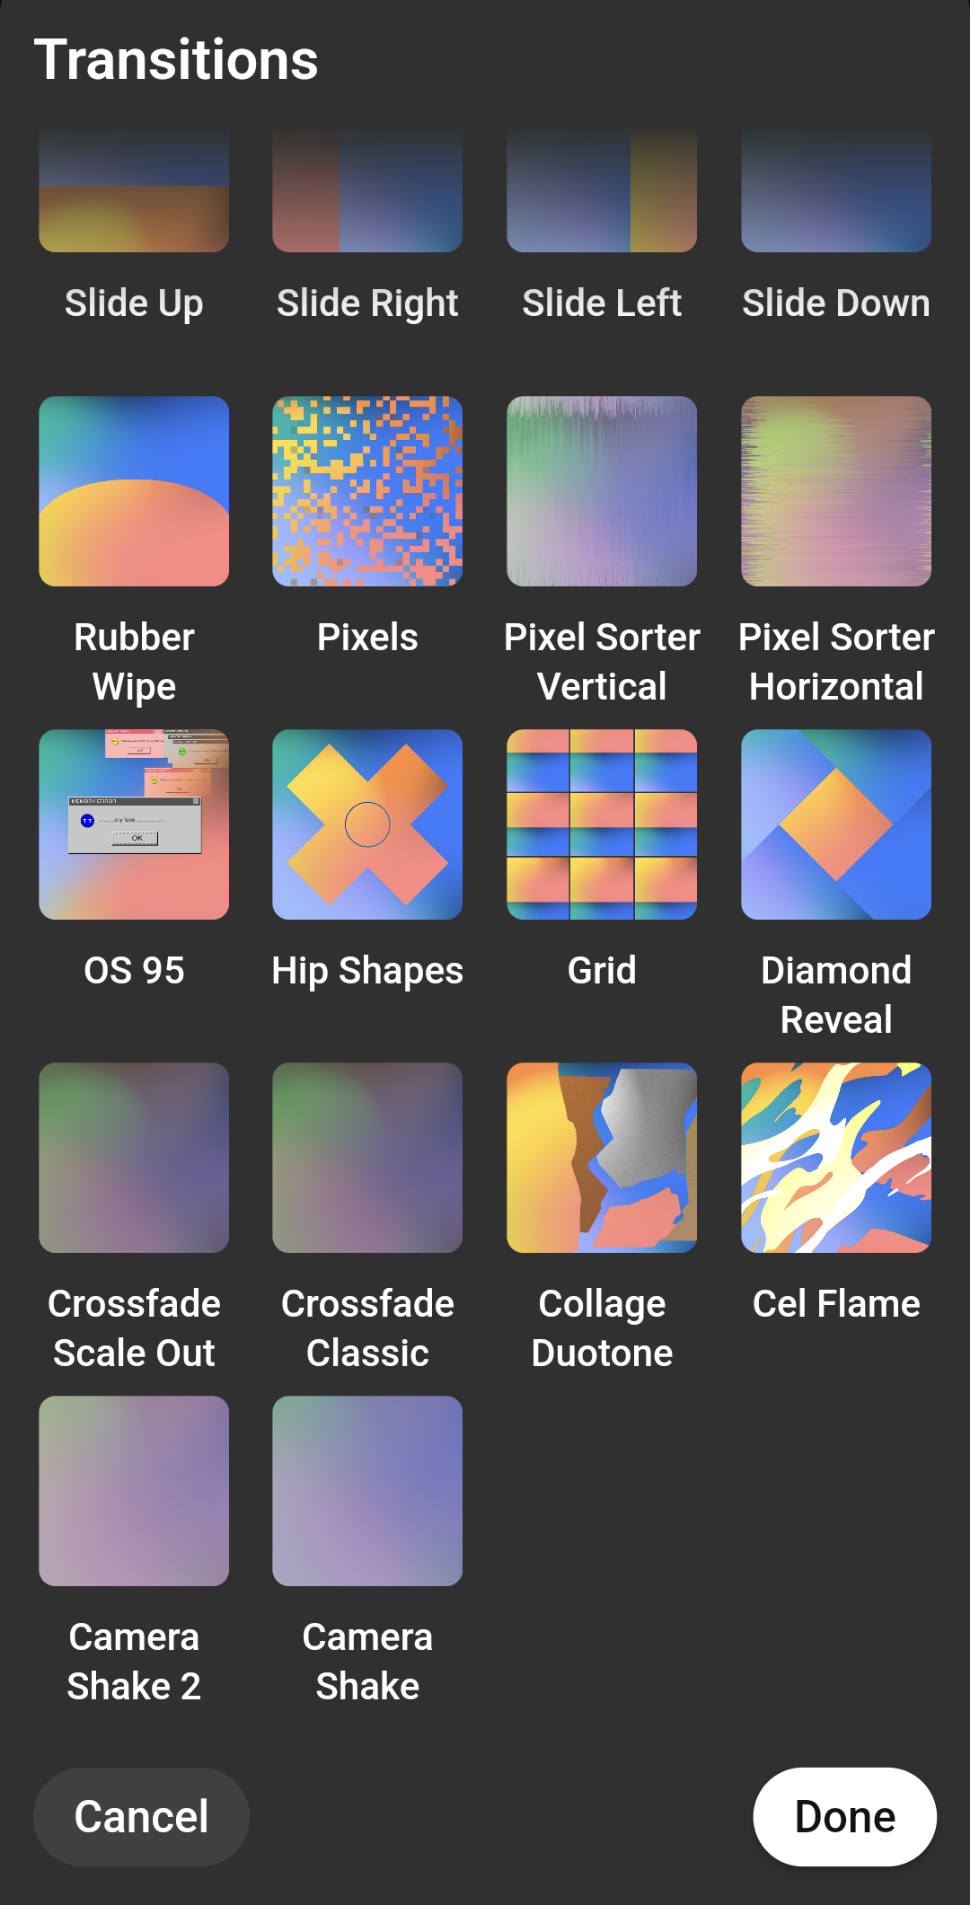
Transitions
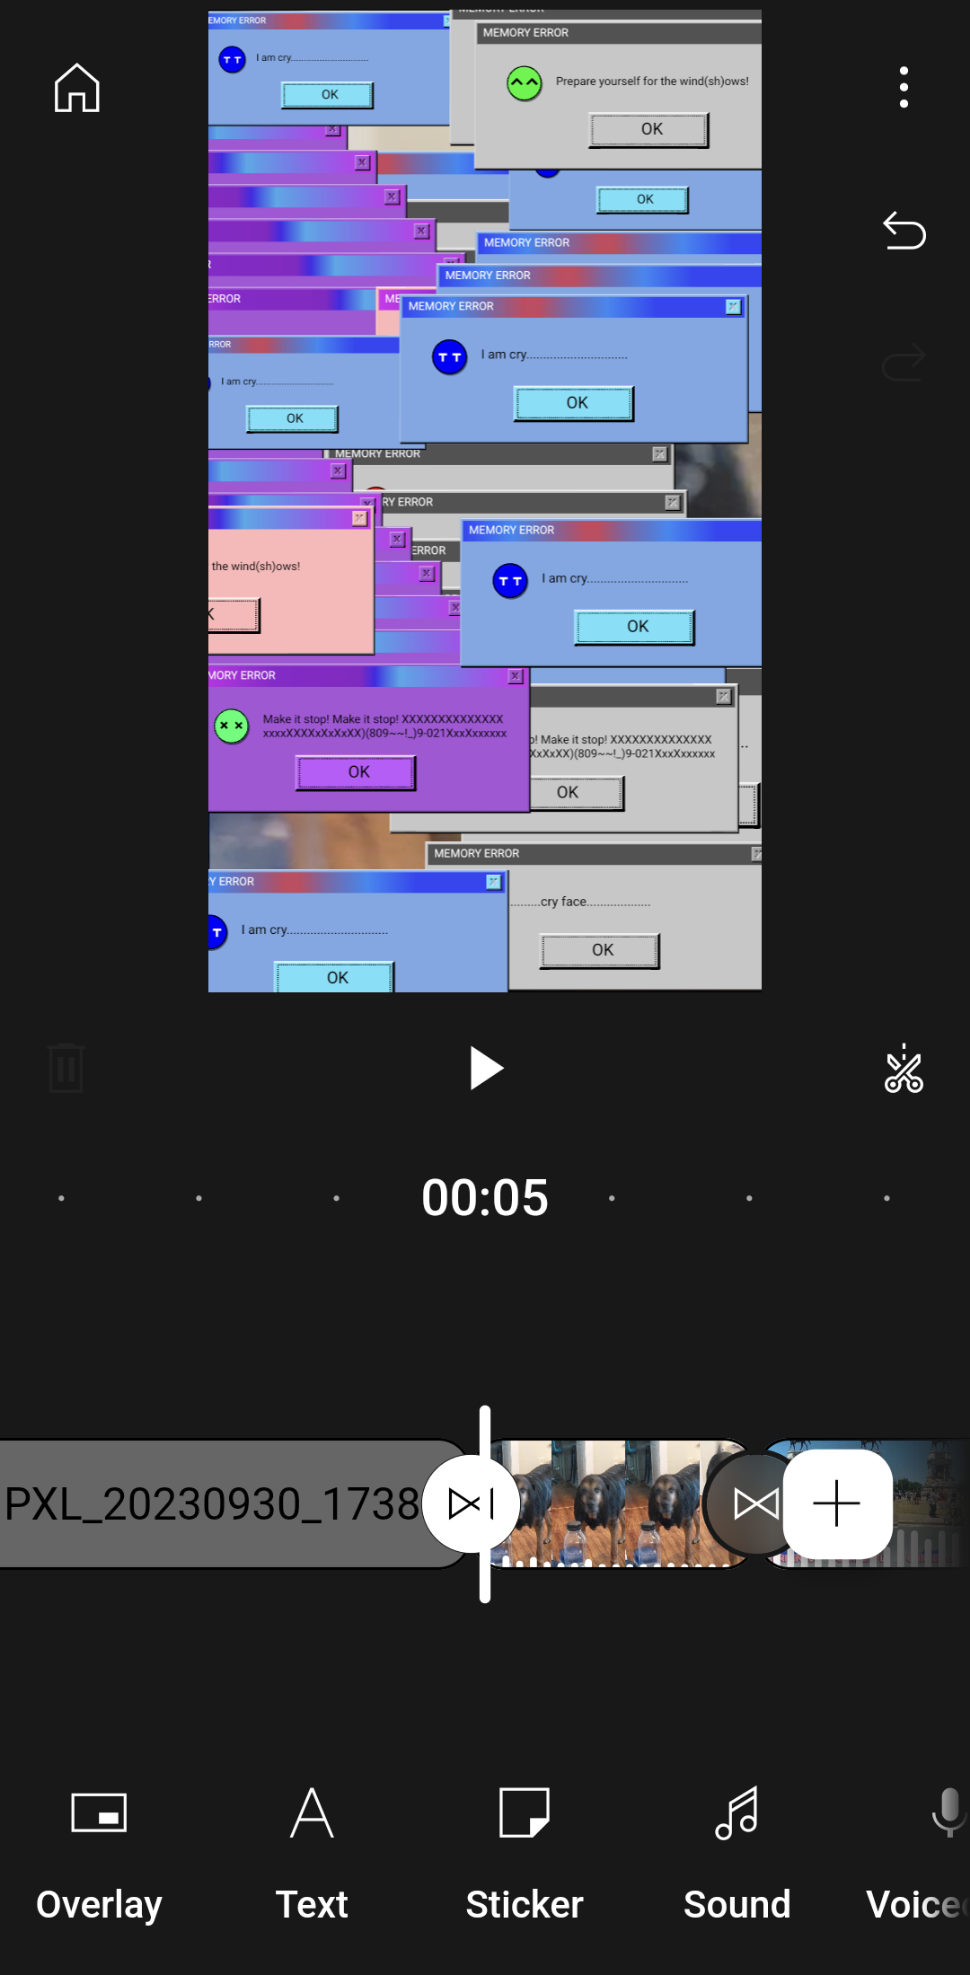
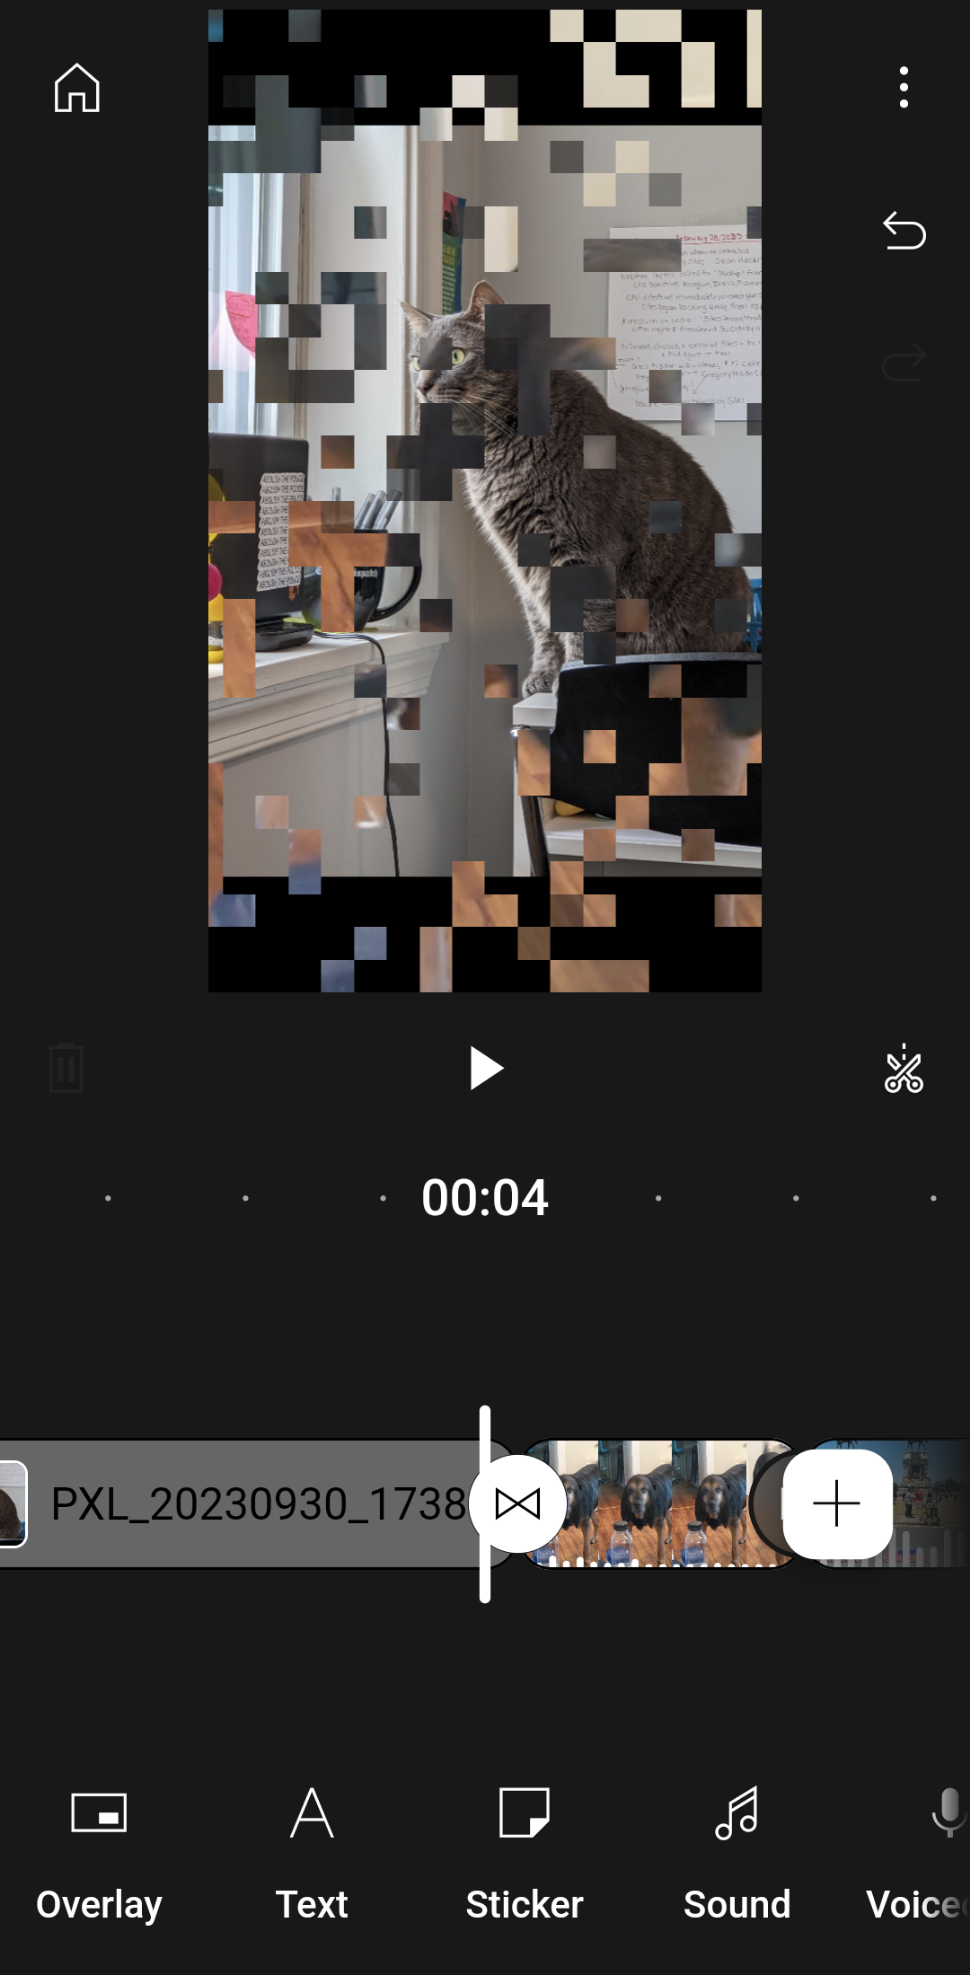
To add Transitions, long-select a timestamp between two imported clips. You'll see a panel of creative options appear. Some cool ones include Camera Shake, TV Glitch, Collage Duotone, and even OS 95 if you're a vaporwave fan.
Once you're done arranging, cropping, trimming, and adding effects, select the downward arrow in the bottom left to return to the main project editor.
You'll see a new series of options at the bottom of your screen: Overlay, Text, Sticker, Sound, Voiceover, and Captions.
Stickers, Emojis, GIFs, & Text
You can add Stickers, Emojis, and GIFs (think Snapchat). Any new GIFs, stickers, or emojis you add will appear above your video timeline.
GIFs appear in Picture-in-Picture mode (as an overlay), creating a distinctive effect well-suited for memes and reaction videos. Add as many layers of media on top of each other as you like.
When using Picture-in-Picture mode (or if you've inserted any clip, emoji, or sticker, on top of your media, select Move to Front or Move to Back to swap their positions.
Royalty-Free Music, Sound Effects, and Voiceover
Once you've returned to the Project Editor, you can add royalty-free sound effects and music.
YouTube promises all items in this library are royalty-free, meaning you can use them without getting a Copyright Strike for your channel.

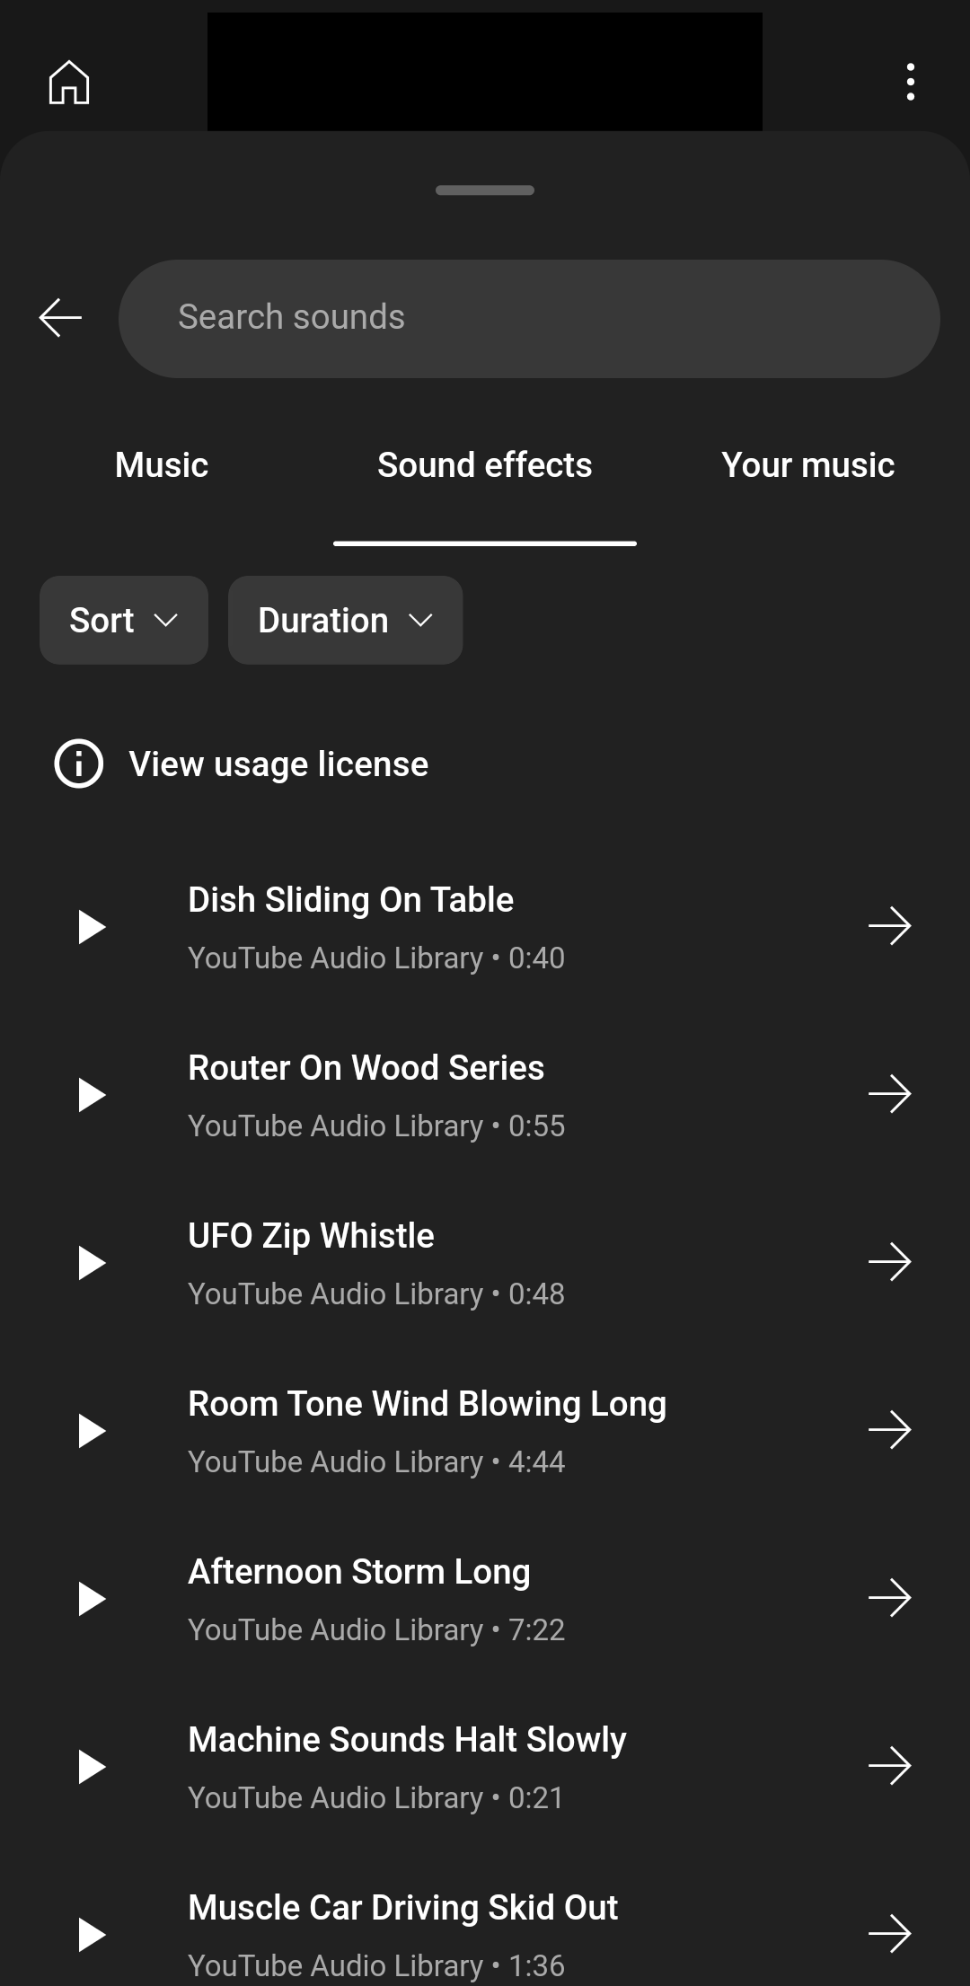
Within the Sounds library, you'll see a search bar and three tabs: Music, Sound Effects, and Your Music, the last of which populates with any audio files you import from your device.
You can sort sounds alphabetically, by upload date (Most Recent), or by Duration (0:00-01:00, 01:00-3:00, 3:00-5:00, and 05:00+). A dropdown in the Music tab will filter by genre (Ambient, Blues, Classical, Dance & Electronic, Metal, R&B & Soul, Reggae & Caribbean are just a few).
Want more sound features? You can select Voiceover to add or record a new audio clip right within the app.
Automatic Captioning
YouTube Create's most technologically impressive feature is probably its auto-generated, customizable Captions. To use it, return to the project editor, select Captions, grant YouTube Create permission to process your video's audio, select a Source (all videos or voiceover), and then select a language (English, Spanish, or Hindi only).
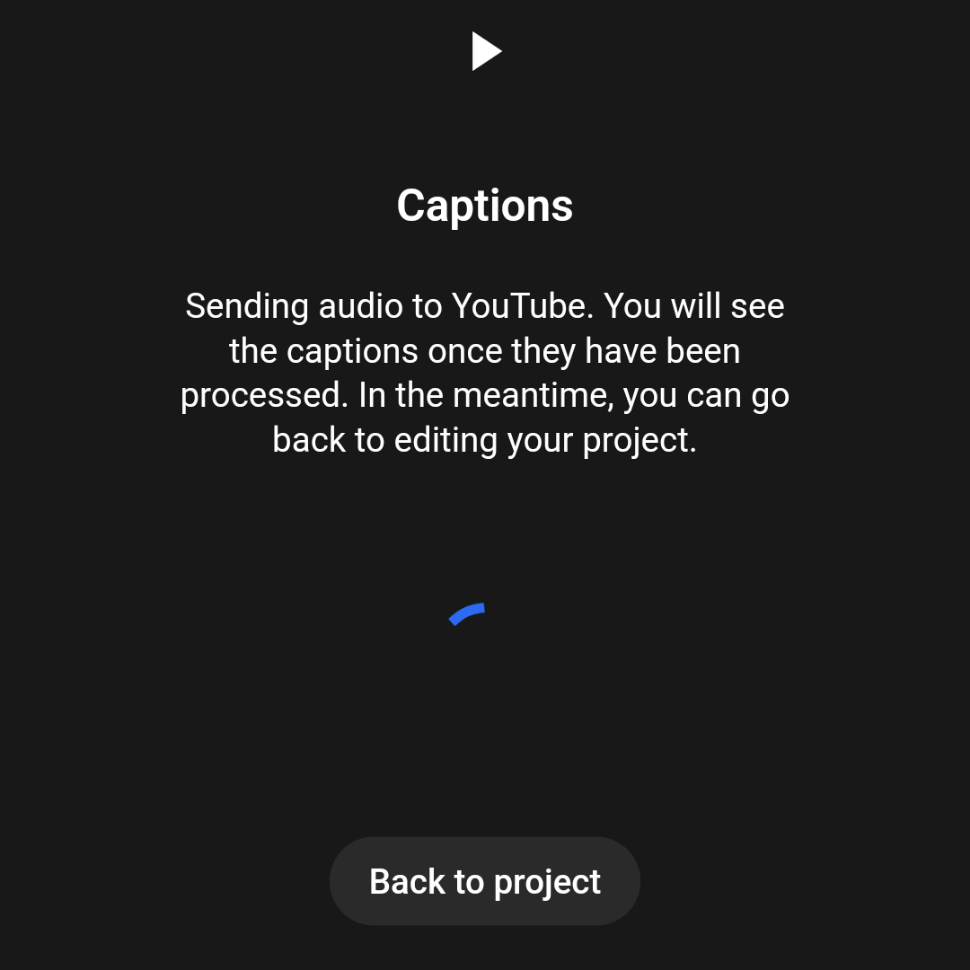
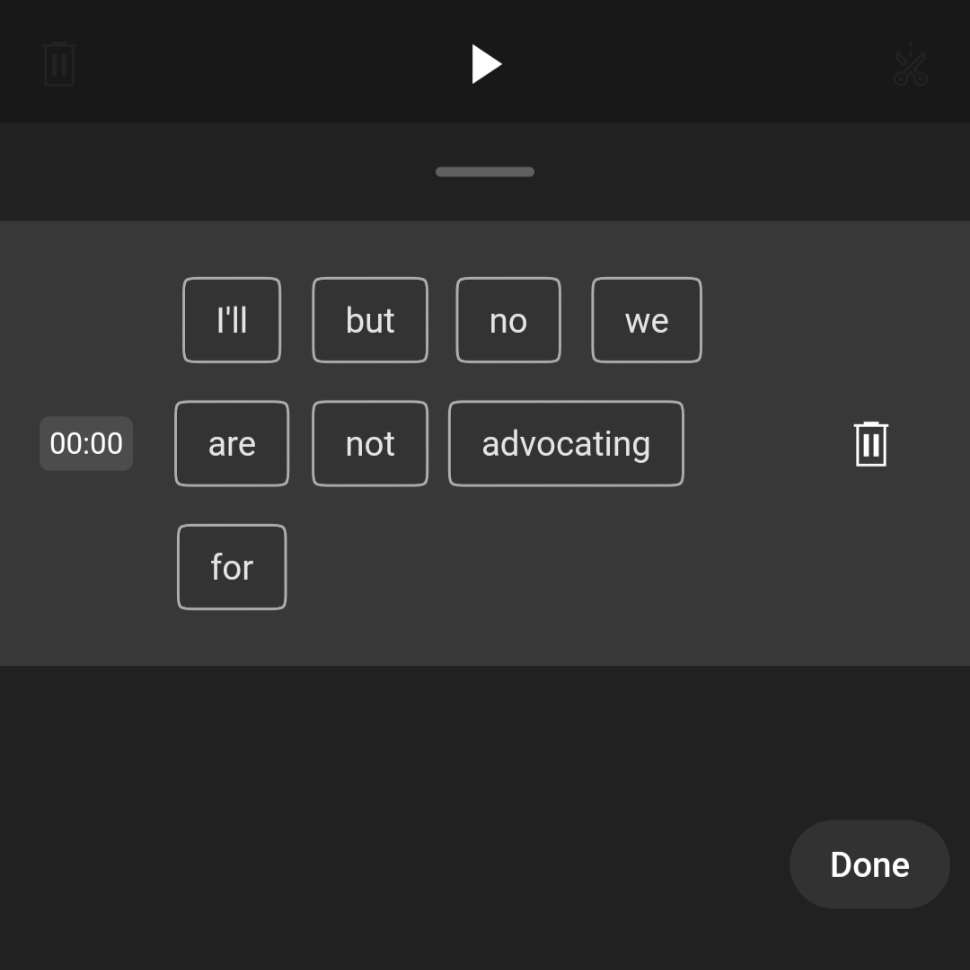
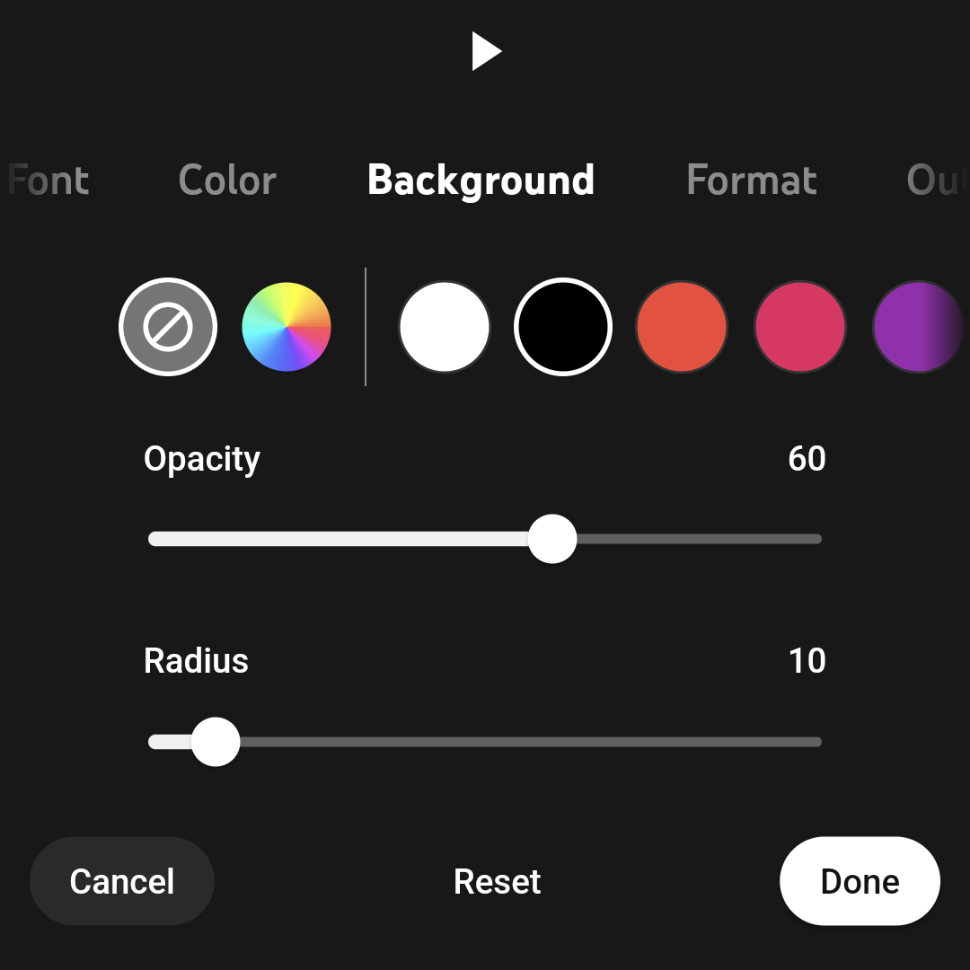
You can even adjust what your captions look like. Go to Style and play with Font, Color, Format, and Overlay to see which look feels right. Better yet, if the automation gets captions wrong, you can select and edit the words themselves.
The accuracy? Surprisingly not bad. This feature alone is an enormous step for user accessibility.
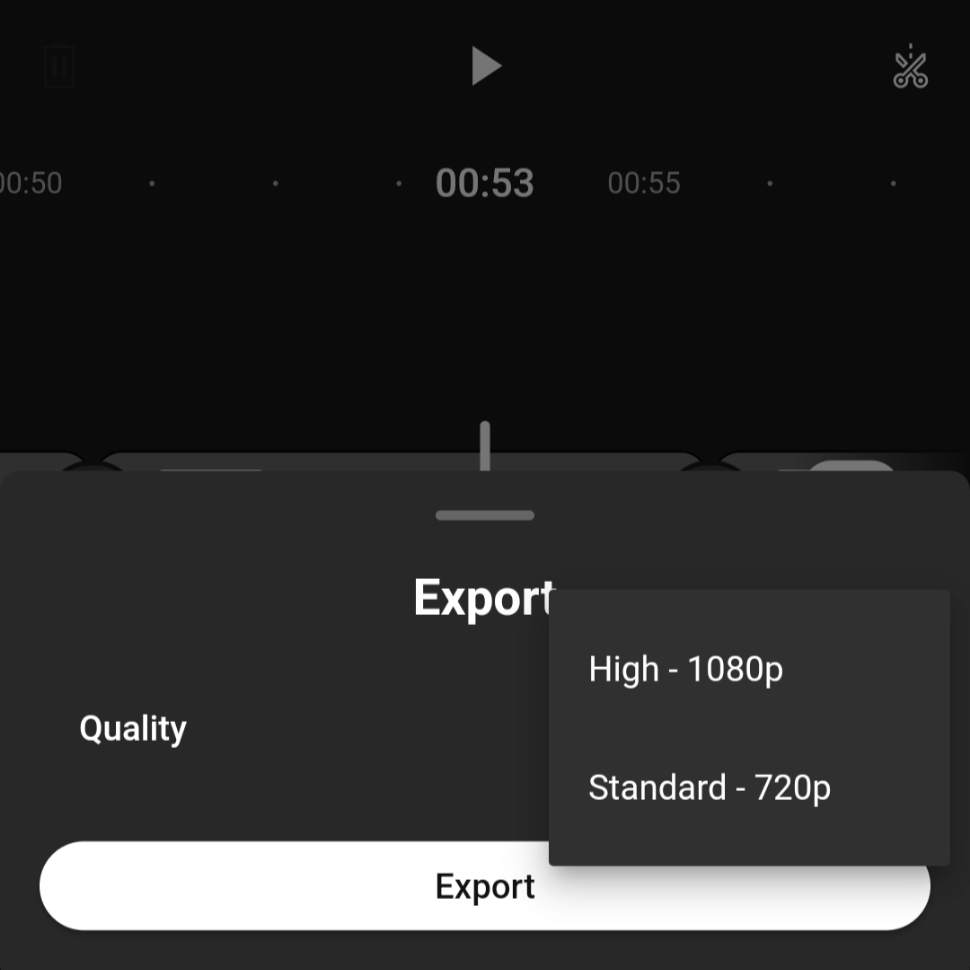
Export and Share
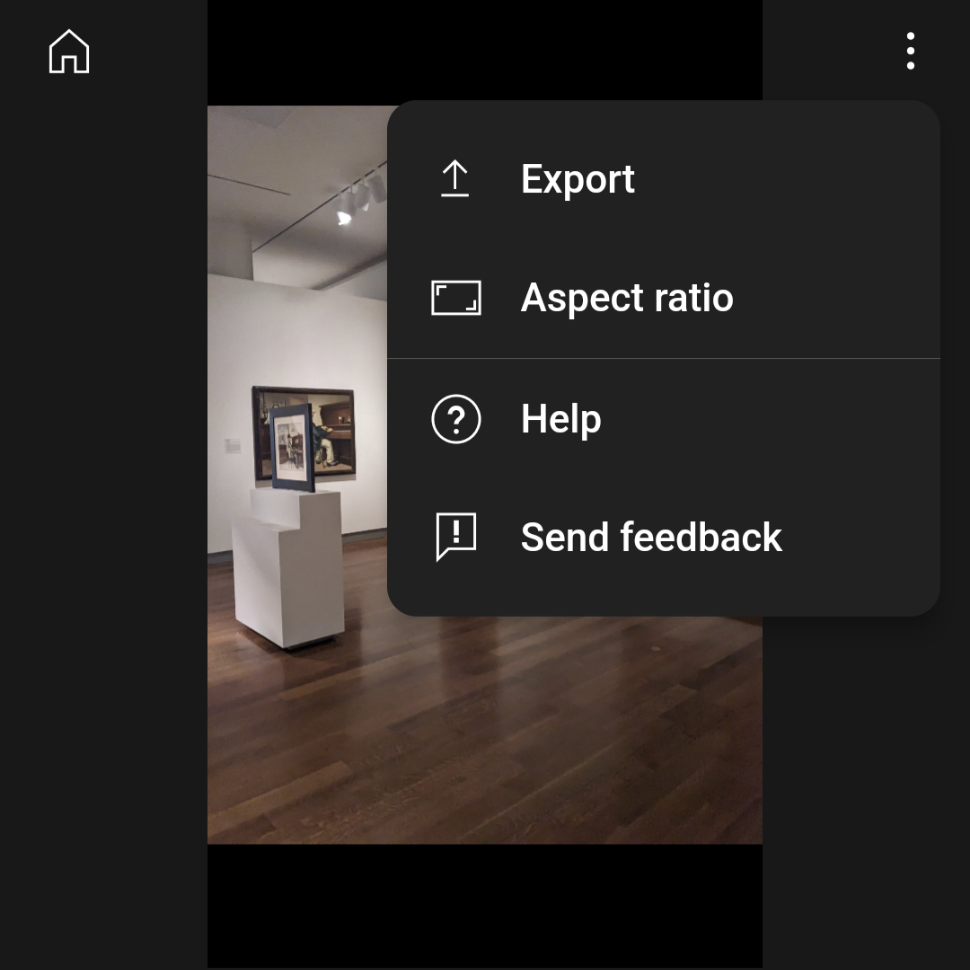
Ready to export? Select the three dots in the top right corner. You can select an Aspect Ratio - theater mode (16 x 9), vertical video (9 x 16), or square (1 x 1) - and a Video Quality - High (1080p) or Standard (720p).

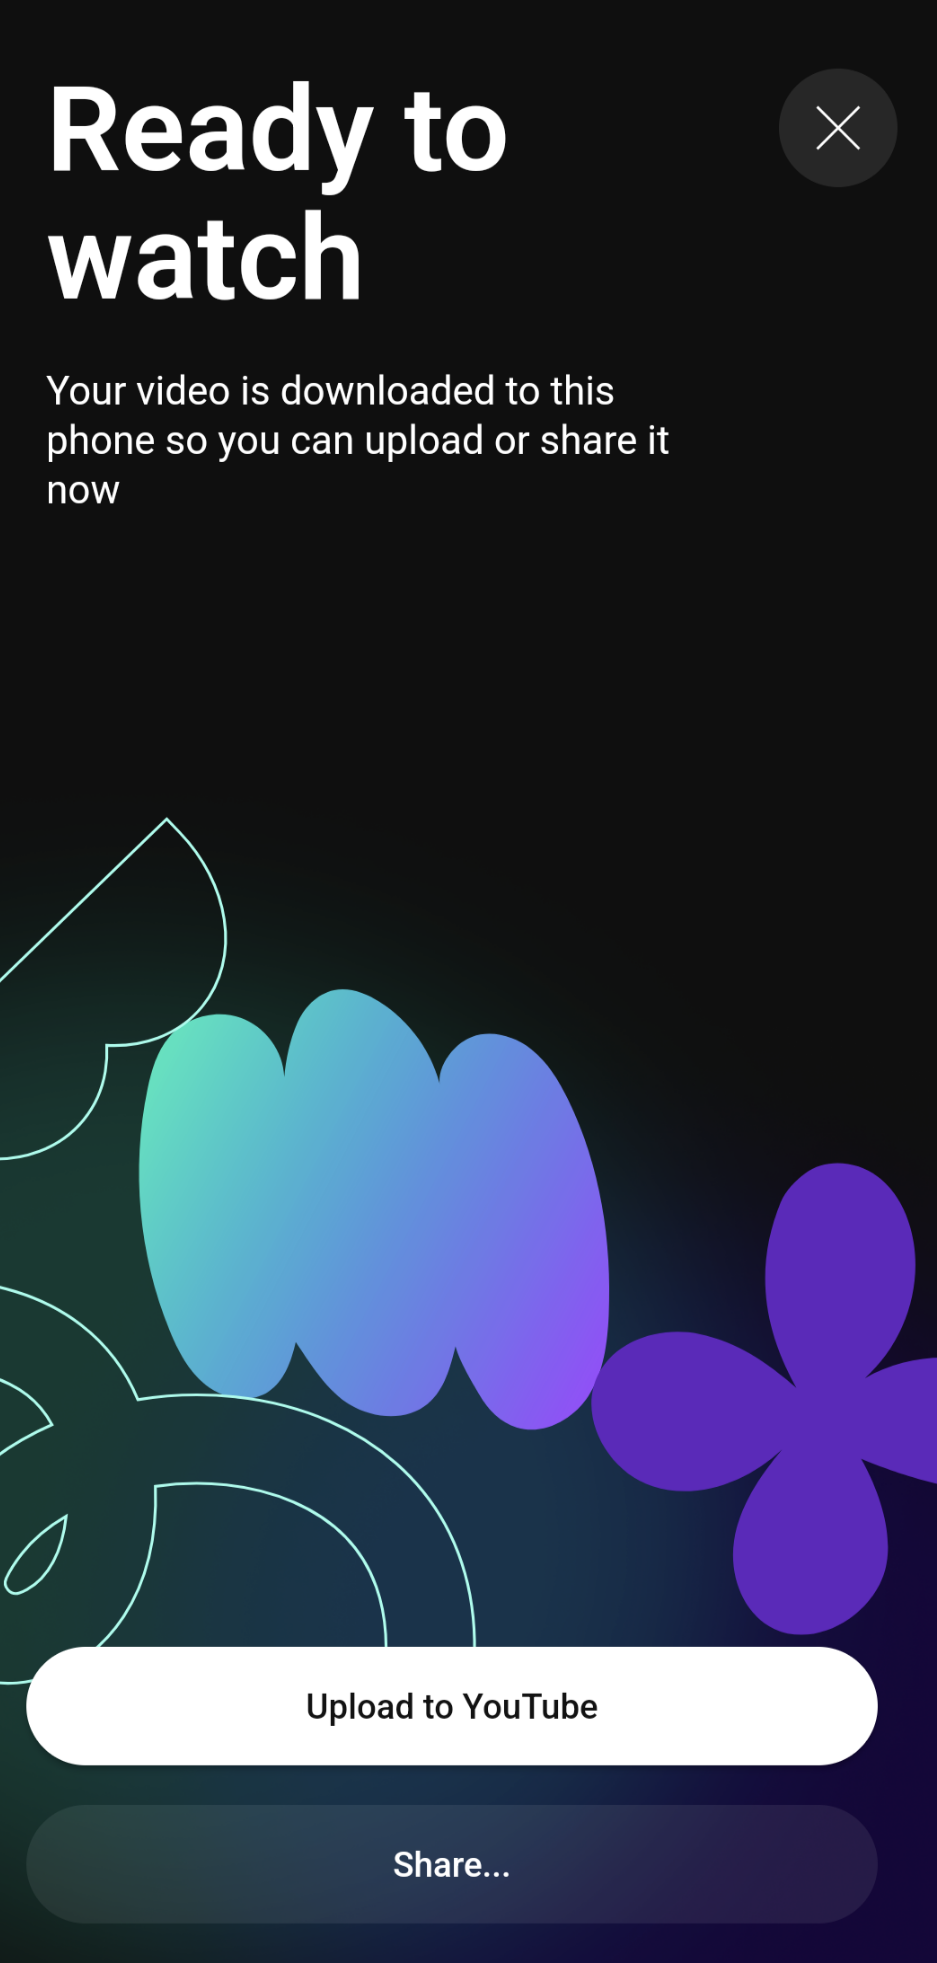
Once you've hit Export and selected a video quality, a gradient screen will appear asking you not to close the app. (It's not a quick process, but it's not unbearably slow.) YouTube Create then downloads the project to your device.
Once the export is complete, you can select Upload to YouTube (if you've linked your YouTube account) or Share (to send an mp4 file any other way).
That's it! Welcome to YouTube Create.